
How to Use Custom Templates in SOLIDWORKS
When starting a new document in SOLIDWORKS, whether it be a part, assembly, or drawing file, you must always start by first selecting a document template. You will notice in the New SOLIDWORKS Document dialog that there are three default templates – one for parts, another for assemblies, and yet another for drawings. By default, these templates are used to initiate the specific type of file you intend to create.

What are Document Templates?
Templates are pre-defined documents prepared with specific settings and are used to standardize the settings for new files that are created. In other words, with document templates, you can save document properties for use in new documents. These properties become the default settings for any file created using that specific template. For example, you can create two different templates for part files – one set to inch units, and the other set to millimeters. This way, whenever you start a new part document using either of these templates, the desired units will already be set. Template files have their own unique extensions: .prtdot for part files, .asmdot for assembly files, and .drwdot for drawing files.
While there are the three aforementioned default templates included in SOLIDWORKS, you have the ability to create custom templates as desired. Templates can be created for parts, assemblies, and drawings, and there is no limit to how many templates you can create. There are a number of properties that can be modified and set in creating templates.
How to create templates will be covered in a separate blog; however, creating templates is only half of the story. Once you’ve got your custom templates, whether you’ve created them yourself or you’ve simply downloaded them from elsewhere, the next step will be to load these templates into your SOLIDWORKS system so that you can access them for use.
How to Load Custom Templates into Your SOLIDWORKS System
Loading custom templates into your SOLIDWORKS system is a relatively straightforward process. Keep in mind, though: your custom templates should be grouped within a folder to complete this process, even if there is only one template. You cannot select and load a single template file itself.
To load your templates into SOLIDWORKS, whether for your Part, Assembly, or Drawing files, execute the following steps:
First, launch SOLIDWORKS and access your System Options by selecting the Gear icon.
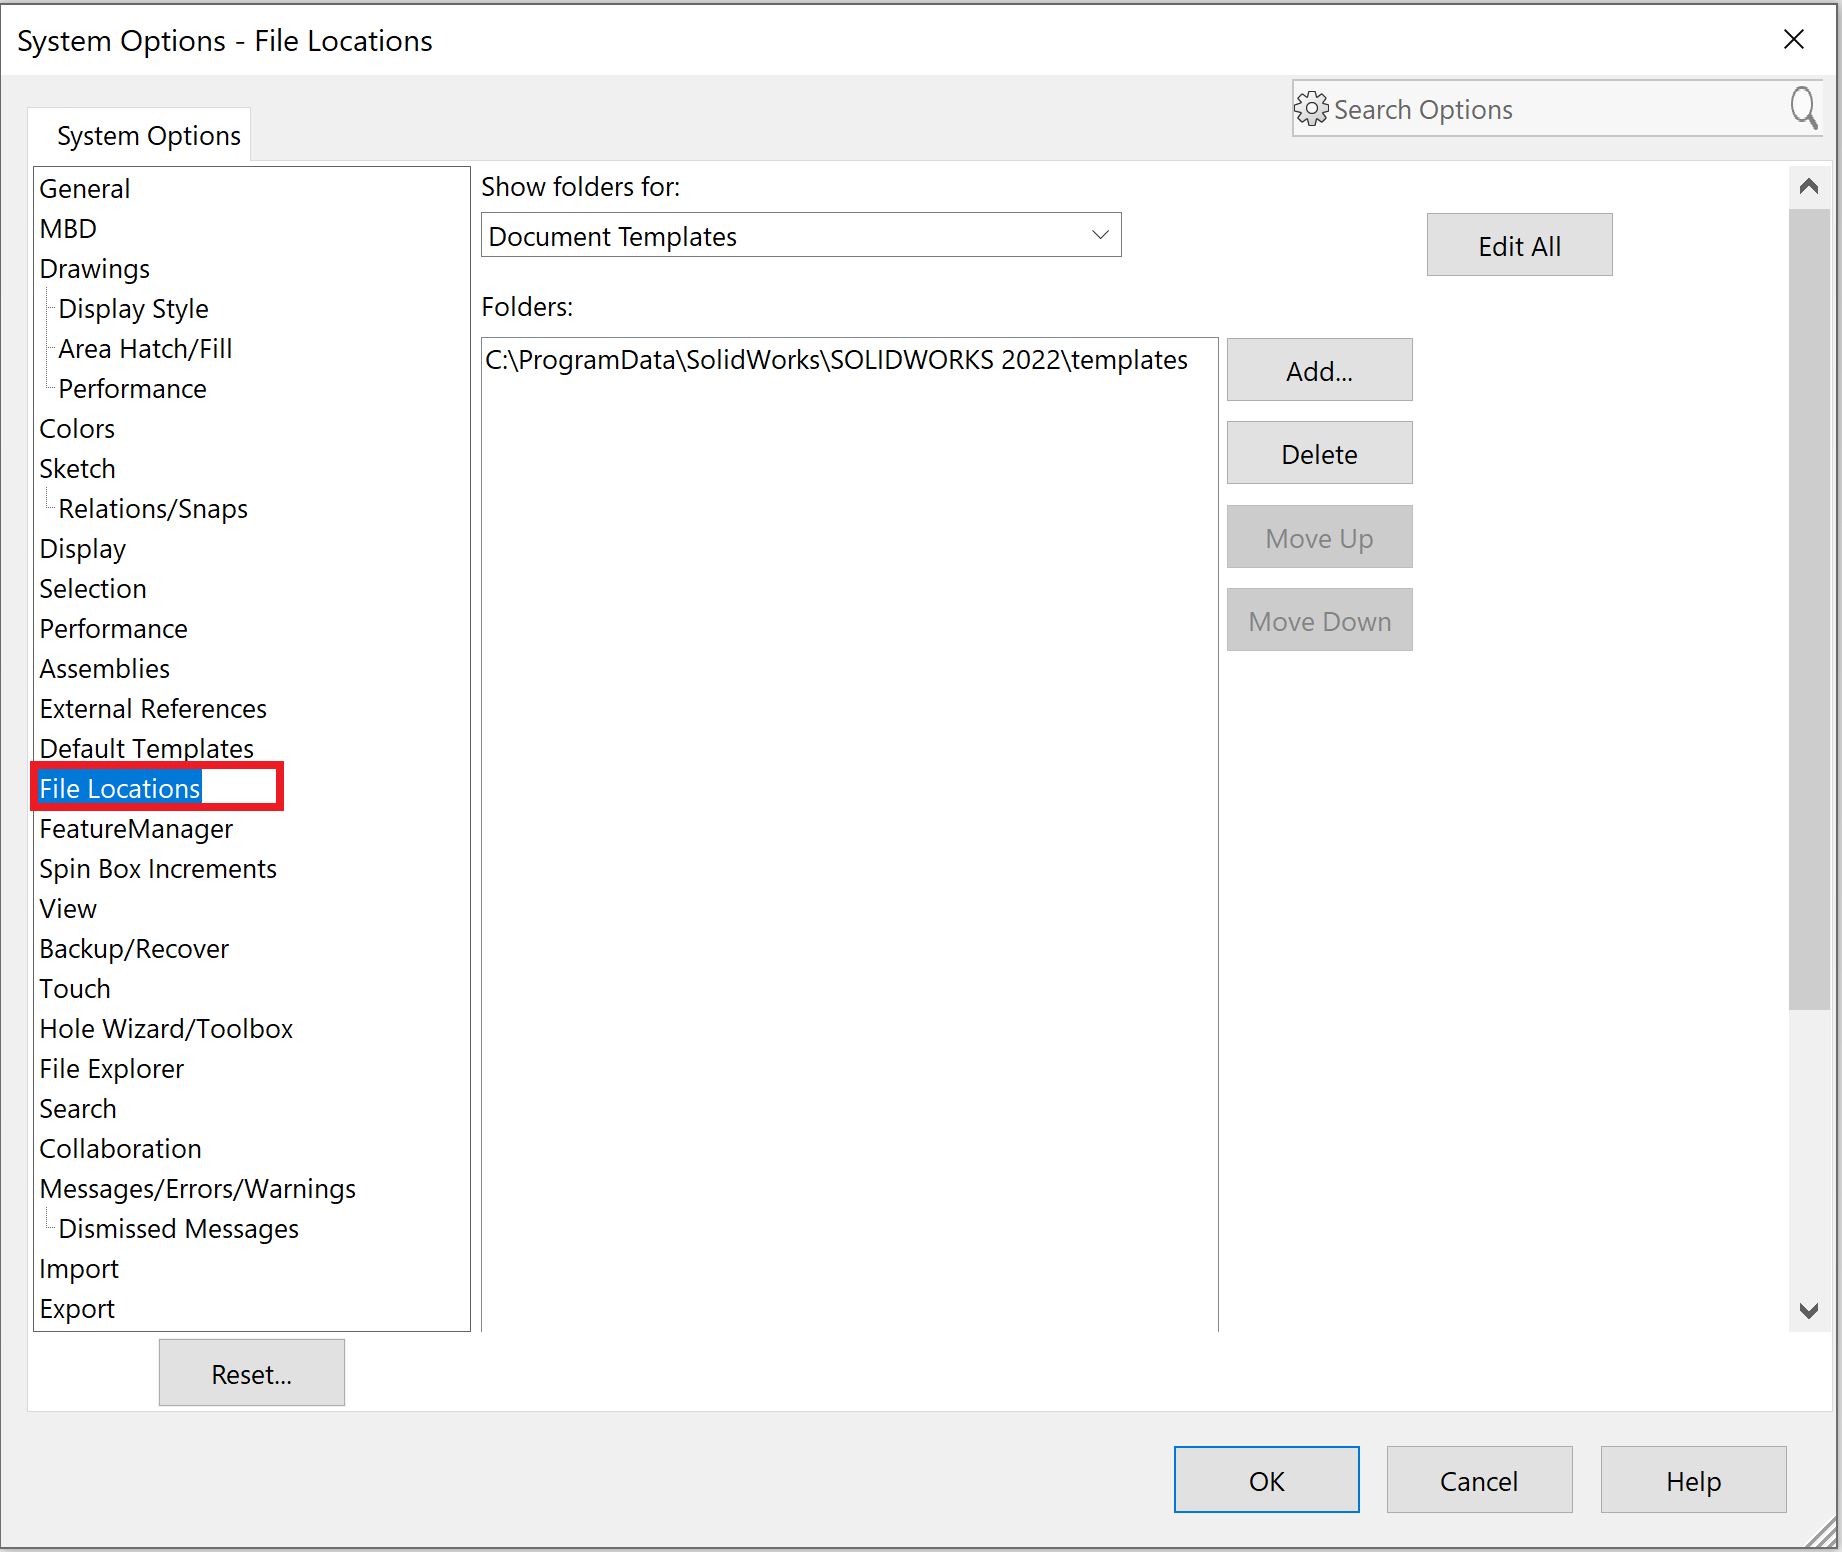
From the System Options dialog, access the File Locations tab listed in the left pane.
From the Show folders for: dropdown menu, select Document Templates. This should be the first item in the list, and it is likely that it will already be selected upon accessing the File Locations tab.
Once you’ve selected to show folders for document templates, click on the ‘Add’ button. From the Select Folder dialog that pops up, navigate to the location in which you saved your templates, and locate your custom template folder. Once selected, click on the button ‘Select Folder’.
You should see that the selected folder will now appear in the Folders list. All you have to do now is click OK!


(Click on an image to enlarge it)
Note: Upon clicking OK, you might receive an additional dialog asking you to confirm these changes. Simply click Yes!
And, you’re all done! Your custom templates should now be successfully loaded into your system, and they should be easily accessible and ready for use.
Accessing your Templates Once They’ve Been Loaded Into SOLIDWORKS
To access and use your custom templates once they’ve been successfully loaded into SOLIDWORKS, simply navigate to the New SOLIDWORKS Document dialog, and verify that you do in fact see an available tab that reflects the name of the folder you loaded into your system. You can access this dialog by selecting the sheet icon in the overhead toolbar (or, of course, by selecting ‘New’ from the File dropdown menu).


Note that you must be viewing the Advanced options in order to see your available template tabs; if you instead land on the Novice page upon accessing the New SOLIDWORKS Document dialog, simply click on the ‘Advanced’ button in the bottom-left corner to end up in the right place.

From here, you should see your newly-added template tab!

And now, all you have to do is access the tab, and all of your custom templates will be there!

And that’s it, you’re all set! You’ve successfully loaded your custom templates into your SOLIDWORKS system! To use any of your templates from here, simply select it and click OK (or, of course, double-click it)!
Happy designing!
Sarah is a Technical Support Engineer at SWYFT Solutions with a background in computer-aided design and technical instruction. She graduated from California State University, Fullerton with a Bachelor’s degree in Mechanical Engineering. During her free time, Sarah enjoys road trips, playing piano & writing music, and bringing her personal ideas and creations to life by designing in SOLIDWORKS and 3D printing.
Connect with Sarah on LinkedIn